Appearance
Bonjour Multicast DNS
mDNS (multicasting DNS) is a technology that allows devices to automatically find and connect to services, such as printers, file servers, or other devices, without the need for manual configuration or a centralized server.
mDNS operates on the principle of broadcasting domain-specific information over the local network, making it easier for users to set up and use networked devices without extensive technical knowledge or manual intervention. It's a key component in creating user-friendly and efficient local network experiences.
This has used particularly in Apple's ecosystem in what they codenamed "Bonjour" protocol. But it's also possible to make it available to other systems.
Windows
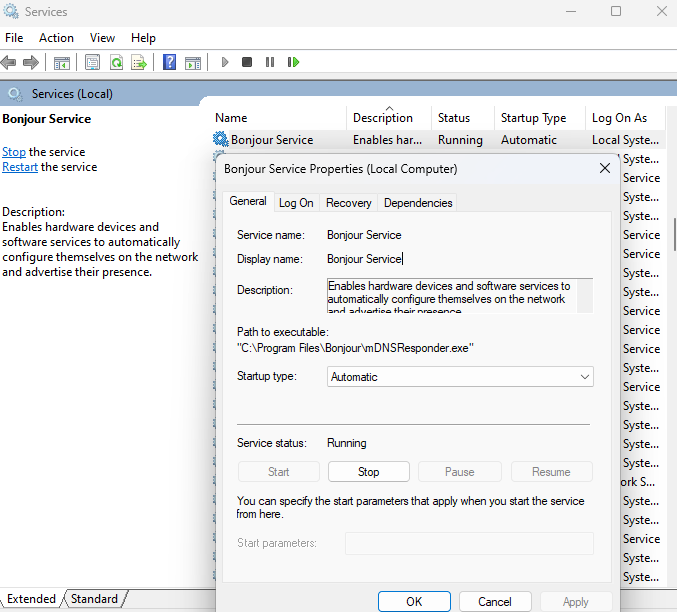
To enable support for Bonjour and Multicast DNS (mDNS) on a Windows computer, you typically need to install the Bonjour Print Services or Bonjour SDK (Software Development Kit). If you have access to winget you may run the below from the commandline:
pwsh
winget install Apple.BonjourPrintServicesAfter installing and restarting the service, you can check if Bonjour is running on your system, by opening the Services application:
- Press Win + R to open the Run dialog.
- Type
services.mscand press Enter. - Look for the service named either
Bonjour Serviceor##Id_String1.6844F930_1628_4223_B5CC_5BB94B879762##(old nomenclature).
If you are a developer or need to use Bonjour in your applications, you might want to install the Bonjour SDK. The SDK includes libraries and headers for developing software that uses Bonjour. Download and install the Bonjour SDK from the official Apple developer website if needed.
Linux
Suppot for mDNS/DNS-SD can be made available in Linux by running Avahi as a system service.
This might b included by default in some distributions, but if it's not, you may install in via your package manager, it might be named avahi-daemon or sometimes it migt be included as part of the nss-mdns package.
After installation, you can enable it through systemd as below:
sh
sudo systemctl enable avahi-daemonAndroid
On recent Android versions there is usually nothing to install for basic .local hostname resolution. Android's DNS Resolver has supported mDNS .local lookups since Android 12 (2021), so browsers and apps that use the normal system resolver should be able to open names such as http://nas.local or http://printer.local when the phone is on the same local network.
Having the Android phone advertise itself as a generic hostname like phone.local is a different matter. Stock Android can resolve mDNS names, and apps can advertise services, but there usually is not a built-in user setting that makes the phone publish its device name as a stable .local hostname for the whole system.
Android apps can use the official Network Service Discovery API, which is based on DNS-SD/mDNS, to register a service with NsdManager (for example as _http._tcp.local) and assign a given service name.
Termux can be a workable non-root option for advertising the phone itself, because Termux runs native Linux userspace programs on Android. The rough approach is to install Avahi, set a hostname in Termux's Avahi configuration, and keep the daemon running while you want the phone to be visible:
sh
pkg install avahi
vi "$PREFIX/etc/avahi/avahi-daemon.conf"
avahi-daemon --no-chroot --debug
In avahi-daemon.conf, look for or add values such as:
ini
[server]
host-name=androidphone
domain-name=local

[publish]
publish-addresses=yes
publish-workstation=yes
If it works on your network, other devices should be able to resolve androidphone.local while Termux and avahi-daemon are running. This is not quite the same as native system-wide Android support: Android may stop background processes, battery optimization can interfere, and it will not survive reboots unless you arrange startup yourself, for example with Termux:Boot. Some networks also block Wi-Fi multicast traffic, especially guest networks.
Synology NAS
To have a Synology NAS broadcast an mDNS domain, just enable it in the Web UI.
Control Panel -> File Services -> Advanced -> Bonjour
